
Natalie Paull shares the choc-raspberry cake with a cult following and her favourite brownie recipe in this extract from the follow-up to her bestselling debut cookbook, Beatrix Bakes.
When Natalie Paull, founder of Melbourne’s now-closed North Melbourne bake shop, Beatrix, launched her now-classic debut cookbook, Beatrix Bakes, she skipped the recipe for her cocoa sour cream layer cake. The choc-raspberry cult favourite outsold the popular red velvet cake in whole cake orders; however, Paull says there was no malice in leaving it out of her original book: “I thought folks wanted the red velvet most of all.”
So now, after a barrage of emails − it was “the most most most requested” recipe for book number two − she’s giving the people what they want, especially those regulars who would order it for every family member’s birthday. The beloved chocolate cake is included in Beatrix Bakes: Another Slice, the follow-up to her 2020 bestseller that became a lockdown saviour for many home bakers, myself included. It’s a weekend baking project if ever there was one, but believe me when I say the hype is real.—Annabel Smith

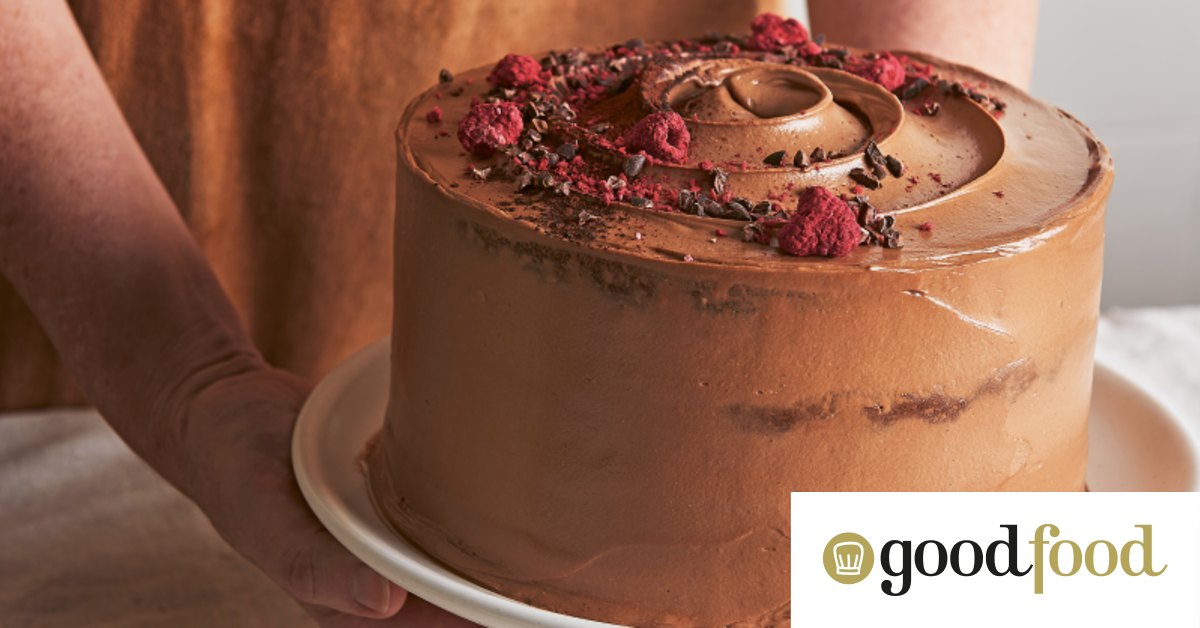
Cocoa sour cream layer cake
Hands down, this is my all-time favourite chocolate layer cake. It’s not fudgy but lofty, and softly cocoa-y with a gentle sour cream tang. The silk-like chocolate buttercream doesn’t overwhelm like ganache, and I add fresh raspberry for fruity balance. I can easily eat an eighth-sized wedge of this perfect, perfect cake time after time after time.
The tenderness I love so much in this cake also makes it very fragile, so a helpful step is to make the layers the day before, or chill them for an hour before assembling.
INGREDIENTS
- cooking oil spray
- 250ml (1 cup) water
- 20g Dutch cocoa powder, plus extra for dusting
- 90g good bittersweet chocolate – chopped or buttons
- 5g (½ tsp) vanilla paste
- 350g caster sugar
- 170g unsalted butter, squidgy soft
- 20ml vegetable oil
- 300g soft plain flour
- 10g (2 tsp) baking powder
- 4g (heaped ½ tsp) bicarbonate of soda (baking soda)
- 5g (heaped ½ tsp) fine sea salt
- 150g egg (about 3 eggs), room temperature (or warm the uncracked eggs in warm water)
- 240g full-fat sour cream, room temperature
- 1 batch Dark chocolate German brown butter buttercream (see recipe)
- 125g fresh raspberries OR 30-40g extra freeze-dried raspberries
- 20g freeze-dried raspberries
- extra cocoa for dust
METHOD
- Preheat the oven to 160C fan-forced (180C conventional). Lightly spray the sides of two 20cm round × 5cm deep cake tins with cooking oil. Line the sides with baking paper strips, then line the base with a circle of baking paper.
- Bring the water to the boil on the stove. Weigh the Dutch cocoa and chocolate together in a medium bowl, then weigh in 130g/ml boiling water (see note). Let it sit for 30 seconds, then whisk until smooth. Add the vanilla paste. Chill the mix, stirring occasionally while you build the batter.
- Put the sugar, butter and oil in the bowl of an electric stand mixer. Using the paddle attachment, cream the ingredients on speed 4 (below medium) for about 8 minutes until the mix is super pale and fluffy. Stop and scrape the bowl sides down twice during this process.
- Swizzle the flour, baking powder, bicarb soda and salt in a bowl and set aside with a sieve ready. Still on speed 4, add the egg in three batches, beating well between each addition and scraping down occasionally (see note).
- Remove the bowl from the mixer and transfer the mix into a large and wide mixing bowl. Sift over half the flour mix and start folding with a sturdy plastic spatula. When it is almost fully mixed in, fold in half the sour cream. Repeat with the remaining flour mix then sour cream. Finally, mix in the cooled cocoa/chocolate mix and ensure the final mix is uniformly brown with no streaks.
- Divide the batter equally between the two prepared cake tins – about 700g in each – and lightly smooth the tops with an offset spatula. Transfer to the oven and bake for 45-55 minutes until the cake has risen proudly and cracked a little (this will settle to flat), and has a crisp, thin crust. A skewer inserted into the centre should come out clean (internal temperature is 95C).
- The cakes are VERY fragile. Cool the cakes in their tins on a wire rack for 8 minutes. Place a second wire rack or baking tray over the cakes and carefully flip them upside down. Remove the tins and paper carefully, then gently re-invert onto the wire rack so they are top-side up again. Leave to cool for a few hours (up to overnight, ideally) before assembling. Chill them if you need extra layering security. While the cakes cool, make the buttercream.
- To assemble, first trim the uneven tops off both cakes and then cut both cakes horizontally into 2 layers so you have 4 layers altogether. Place one of the bottom halves on your serving stand, cut side up. Scoop on about 100g of the buttercream and smooth it all over the top and just overhanging the side. Repeat the process with the two top halves, then flip the second bottom half so the crust side faces up (cut-side down).
- Next, swipe the buttercream overhang to thinly coat the sides of the cake, and use a little extra buttercream to do the same on the top of the cake. This is your crumb coat. Chill the cake for 5 minutes, then pile 300g of buttercream on top and use the offset spatula to cover the entire cake, keeping the top thick.
- Push a deep swirl into the top. Run your offset spatula around the sides to expose a little of the cake. Dust extra cocoa powder across the top and strew a relaxed coronet of freeze-dried raspberries around the swirl edge – some left whole and some crushed into a ruby crumb. Post-strew, press the fresh raspberries in lightly for a secure attachment to the buttercream while it is still soft. Serve at room temperature so the cake and buttercream textures are at their best.
Serves 8-16
Notes
- Takes 2 hours to prep and bake the layers. Best to rest the layers overnight (minimum 3 hours chilled). You can make the buttercream the day before too (keep chilled), and assemble on the day of eating.
- Keeps For a day at room temperature, then chill to keep for up to 3 days. Can freeze for 3 months.
- Boiling water awakens cocoa to be its most chocolatey self. Weigh the water after it boils for liquid precision – evaporation causes water weight loss.
- Adding eggs in batches keeps the base fluffy and not looking like curdled soup. So, add some egg, and don’t add the next batch until the mix has re-fluffed.

Dark chocolate German brown butter buttercream (or GBBBC)
I adore German buttercream for its velvet texture and mild sweetness. It begins with a small-batch cold-start thick custard. A little creme fraiche brings a balancing tang.
INGREDIENTS
- 50g caster sugar
- 20g cornflour
- 1g (⅛ tsp) cornflour
- 40g/ml cream (35 per cent milkfat)
- 40g egg yolk (from about 2 eggs)
- 200g/ml full-cream milk
- 4g (1½ tsp) vanilla paste, or ½ vanilla bean
- 240g unsalted butter, squidgy (at about 20C)
- 40g creme fraiche (at about 20C)
- 160g warm melted bittersweet chocolate (50-60 per cent cocoa)
METHOD
- To make the cold custard, in a medium bowl, weigh the sugar, cornflour, salt and cream. Add the egg yolks last and hand whisk to make a creamy paste. Stream the milk in then the vanilla (paste or scraped pod and seeds) and whisk well. Scrape the mix into a 20cm saucepan. Adding the egg yolks last helps stop them forming little hard orange “cooked” granules at the start.
- Place the saucepan on a medium-high heat and hand whisk at a slow pace to allow the heat to suffuse through the mix. Work the small balloon whisk into the corners of the saucepan (where the custard thickens first). After about 3 minutes of whisking, the custard will start to look like a creamy liquid (see note).
- Speed up the whisking now – the custard will thicken fast. It will look lumpy but just whisk quickly and it will all come together into an evenly thick paste in another 1 minute.
- Don’t give up at the lumpy stage. It is NOT failure – just the custard cooking at different rates. Keep whisking to achieve silky, evenly thick success.
- As soon as it looks smooth and thick, slow down the whisking and wait for a few burp-like bubbles to pop over the surface. It’s a super thick custard and your whisk should leave obvious furrows as it moves through the mix. Letting the custard visibly boil means the starches are fully cooked, making a thick, stable custard.
- Take the pan off the heat and remove the vanilla pod (if using). Scrape the custard into a bowl and press a piece of cling film onto the surface of the custard to prevent a rubbery skin forming.
- Cool the cooked custard to about 20-30C – it will take about 30 minutes at ambient temperature – stirring regularly to prevent a skin forming (see note). The custard can be cooked the day before and gently warmed back to target temperature in the microwave or over a double boiler.
- When the custard is cooled, place it in a stand mixer bowl with 160g of the butter and the creme fraiche. Attach the whisk and whip on speed 5 (medium) for 3–4 minutes. Stop and scrape down the sides a few times. Don’t panic! At this stage, the mix will look lumpy and sometimes a broken/ split mess, but the hot brown butter will elevate the temperature and bring it back to smooth and creamy. If the buttercream still looks broken after adding the brown butter, elevate the temperature again by scooping out a heaped spoonful, warming it to melty hot, then streaming it back in. Keep warming and whipping, and never ever give up on a buttercream!
- While the mix whips, cook the remaining 80g butter over a medium-high heat until it’s a light toasted brown and bubbling hot. Immediately slow the mixer to low speed and stream the butter slowly into the custard mix while the mixer is still whipping. Stop and scrape the sides.
- Melt the bittersweet chocolate, then stream it into the buttercream. chocolate. Stop and scrape the sides again, then increase to speed 8 (under high) and whip for another 5–6 minutes to smooth fluffiness.
Makes 700g
Notes
- If you haven’t been moving the custard well enough as it cooks, you will notice brown flecks of overcooked custard starting to show. To fix this, use a spatula to push the custard through a sieve into a clean bowl at the end of cooking.
- If, after chilling, the custard appears gloopy then it’s undercooked. Simply return it to a saucepan over a low heat and VERY slowly bring it to a boil again.
Buttercream top tips
Don’t let a split, melty, broken buttercream derail your path to layer cake glory! Here’s how to get your buttercream to a flawless smoothing consistency from chilled.
Too cool and curdled
It will look lumpy and broken/split because it is too cold. The buttercream needs warmth to encourage it to become a stable emulsion. So, take a good scoop out of the mixer bowl, heat (microwave or stovetop) that scoop to melty – NOT bubbly – hot then stream it back in with the whisk going. Et voila!
Too melty. It’s soup!
If it looks like melted ice-cream, chill the mixer bowl for 30 minutes, stirring with the whisk occasionally to help the buttercream chill evenly. Pop it back onto the stand mixer to whip for 2–3 minutes. If you leave the buttercream unstirred, it can harden unevenly and cause pesky lumps in the final buttercream.
If you have melted it to a broken oily yellow mess, you’ll need to start over – BUT stream as much of the broken/split buttercream into the new batch as you can. The new buttercream emulsion can handle a portion of this before becoming unstable.
Pristine consistency
The best texture for a spreadable buttercream is like fresh soft-peak whipped cream. To get to the correct consistency from chilled buttercream, heat to two-thirds melted in a double boiler, or zap in the microwave in 30-second bursts on High (100 per cent).
Give the buttercream a mash with a hand whisk and then bring the two consistencies together with a vigorous hand whisk (or for an ultra-smooth finish, beat with the paddle attachment of an electric mixer on low speed for 5 minutes).
Repeat this technique as needed during the assembly to keep the buttercream easily spreadable – it can cool between crumb coating and top coating. Never attempt to whip fridge-cold buttercream – it will break/split, but never fear: warmth will always return it to spreadable splendour!
Takes About 1 hour.
Keeps Up to 1 week chilled; frozen up to 3 months. After chilling or freezing, ensure the buttercream is softened to squidgy before attempting to re-whip. If you whip cold buttercream, it will split.

The brownie (that is my favourite)
Brownies are like socks. Stay with me here … They are mostly functional, but when you get a really, really good one, you really, really know it and you become deeply loyal to those socks/that brownie. Brownies are also a deeply personal bake – no nuts, fudgy, cakey, edge piece or centre piece? I mean, who am I to tell you what brownie is best, you unique and beautiful unicorn! I can only offer you my favourite.
What makes a brownie really, really good for me are a few things: the long egg and granulated sugar creaming to make a finely flaky top crust, more cocoa than melted chocolate so the brownie stays soft longer (melted chocolate hardens when it cools, making a brownie too firm at room temperature), and the cream cheese addition. I eschew vanilla (no point really) but love salt flakes for a subtle saline crunch. Folks get really obsessive about texture: I define fudgy as the texture a brownie becomes when chilled, gauged by the mouth workout required to chew. Changing the sugar to all brown or dark brown makes the brownie denser, and of course you can do that too.
If this recipe does it for you like it does it for me, I am thrilled. If you are looking for something else, I wish you much success on your quest!
“Brownies are like socks. They are mostly functional, but when you get a really, really good one, you become deeply loyal to those socks/that brownie.”
INGREDIENTS
- cooking oil spray
- 200g egg (about 4 eggs)
- 300g raw caster sugar
- 110g good bittersweet chocolate (about 50-60% cocoa)
- 240g unsalted butter
- 90g plain flour
- 60g Dutch cocoa powder
- 5g (heaped ½ tsp) sea salt flakes
- 180g good extra dark chocolate (about 70% cocoa)
- 110g full-fat cream cheese, softened to room temperature
METHOD
- Heat the oven to 150C fan-forced (170C conventional). Lightly spray a 23cm square, 5cm deep cake tin with cooking oil and line the base and sides with baking paper. Ensure any flappy paper edges are trimmed flush with the tin.
- Combine the egg and sugar in the bowl of an electric stand mixer. Using the paddle attachment, beat on speed 4 (below medium) for 8 minutes until you have a thick and pale foam.
- While the mix beats, weigh the bittersweet chocolate into a small heatproof bowl. Heat the butter to bubbly hot (stovetop or microwave) and pour it over. Stir until the chocolate has melted and is smooth.
- Don’t worry about a small lump of chocolate or two, but any more and you should set up a double boiler and continue to heat the chocolate/butter a little further until properly melted.
- Scrape the warm chocolate/butter mix into the egg mix and beat for 5 minutes on speed 5 (medium) – it will look like a fluffy and flowy chocolate mousse. While it mixes, weigh the flour and cocoa together and sift into a small bowl. Weigh the salt flakes on top. Chop the extra-dark chocolate into fine shards and add 130g to a separate bowl. Tear up the cream cheese into small hazelnut-sized chunks to sit on top of the chocolate. Set aside.
- Stop the mixer and tip in the sieved dry ingredients. Beat on speed 2 (above low) for 1 minute until the flour is absorbed. Take the bowl off the mixer and stir in the chocolate and cream cheese. Some cream cheese lumps will remain and some will smear through, lightening the batter slightly – all of this is good. Scrape the batter into the prepared tin and smooth the top with an offset spatula. Scatter the remaining extra-dark chocolate on top.
- Bake for 25-30 minutes until the top of the brownie is slightly puffed, has a noticeable cracked border about 2cm from the edge and fine fissures further across the surface. My PST (Perfect Squidge Temperature) hits at 95C, with sticky clumps of mottled paste (not liquid chocolate).
- Cool at room temperature for around 30 minutes before cutting with a hot, damp knife, or chill it for a creamy fudge texture.
- Cut the square in half and then cut each half into five equal rectangles (get the ruler out for portioning precision). The first warm bar, with still-molten chocolate chunks, is one of the greatest kitchen gifts bestowed upon a home baker.
Makes 10 brownie bars or 9 large squares
Notes
- If you find a few too-large nuggets of cream cheese when scraping and smoothing, massage them into the ideal size with the tip of your offset spatula.
- Bake for 5-10 minutes longer if you want a more cakey brownie (internal temperature 100C). If you want super-gooey filling, cook it for 5-10 minutes less, but you will definitely have to chill before cutting.
- Internal temperature taking is genius for brownies – no matter the batter, recipe or oven, you can always get the squidge right.
- Keeps Chill the baked brownie up to 2 weeks and allow to soften to room temperature or zap to re-soften before eating.
- Takes 30 minutes to mix, 30–35 to bake from fresh, 10+ more minutes to bake from chilled. Cool down is personal. Very personal.
Brownie adaptrix (change it up)
It’s a bit nutty
Add 120g roughly chopped (to about the size of your pinky fingertip) lightly toasted nuts, keeping a smattering to sprinkle on top. Pecans and walnuts are faves for the mellifluous texture. Avoid almonds, as they are too jarring against the soft brownie texture. Hazelnuts get a hall pass if chopped to a medium coarseness (half pinky fingertip) – heads up, they are very, very good with the Mocha Adaptrix (below).
It’s a bit fruity
If you are Team Fruit With Chocolate, press frozen raspberries (fresh ones will scorch) into the top after smoothing the batter. Don’t swirl the fruit through, as it will release its moisture and can form unpleasantly squelchy internal pockets.
Mocha
Coffee, more than salt or vanilla, will elevate the chocolate flavour – I add this for adults. Add 6g of instant coffee powder to dissolve with the hot butter.
The big chill
Score maximum brownie points and make the batter, then delay the bake. After smoothing the batter into the tin, chill overnight – uncovered is fine. Bake as above – just increase the time by 10+ minutes to allow for the cold start. Some baking boffins swear this melds the ingredients to make a better brownie. I just like that I can mix, rest and bake for easy warm brownie joy.

This is an edited extract from Beatrix Bakes: Another Slice by Natalie Paull, Hardie Grant Books, RRP $50. Available in stores nationally from March 6, 2024. Buy now. Photographer: © Rochelle Eagle 2024
The best recipes from Australia’s leading chefs straight to your inbox.
Sign up
From our partners
Also Read More: World News | Entertainment News | Celebrity News